

Happy Monday out there in blogland x
As promised another one of my wreaths that I designed and created from last year.
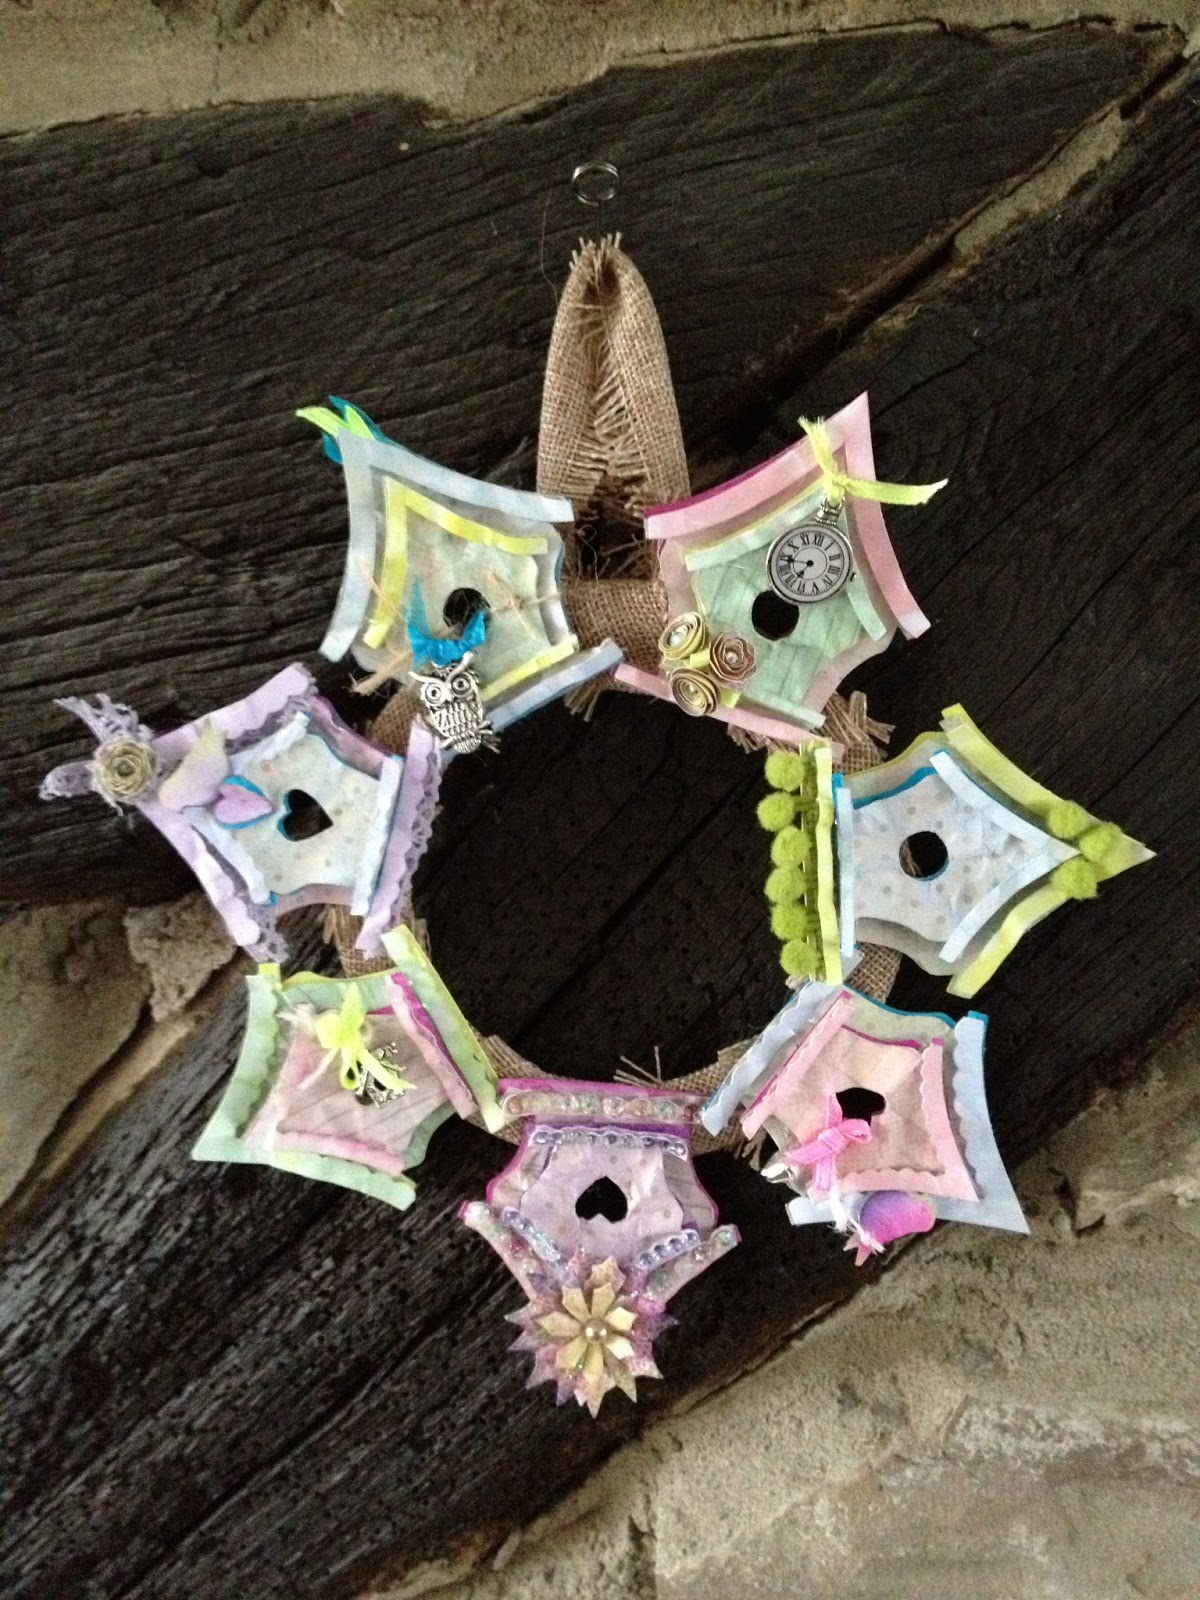
A layered birdhouse Wreath.
I just loVe birds 'n' birdhouses so creating it was a ball x
Hope you enjoy!!!
 |
| Mmmmmmm, sugared almonds spring to mind!!! |
After cutting out my basic wreath ring from grey-board - (i use my Grand Calibur 'n' Spellbinder circle dies but you can also use dishes from your kitchen such as a tea plate, coffee mug etc to draw around and cut out) I then covered my wreath ring with Hessian and created a little hanger too. I purchased my Hessian ribbon strips/lengths from my local craft shop 'The Craft Box'
 |
| I loVe the charms from The Hobby House - unbelievable prices and fab quality |
As you will see as you keep looking at the piccy's I've taken I took individual piccy's (for finer details) of each birdy house as it was sat hanging from my craft room wall. Hence the piccys are all at different angles - dough!!! (silly me!!!)

Now to create one of the layered birdhouses.
I cut out all the birdyhouse layers (2 large and 2 small birdyhouses), roof, base strips and apertures by hand and coloured all the different layers with Pan Pastels x
The 2 larger birdhouses (1 plain card stock, 1 patterned paper, felt etc) layer/adhere together (pinflair glue - for 3d depth)
The 2 mini birdhouses (1 plain card stock, 1 patterned paper, felt etc) layer/adhere together using the 3d glue again.
Adhere (using 3d glue) the mini layered birdyhouses over the top of the big layered birdyhouses.
Once all the 4 birdyhouse layers are adhered I then decoupaged/layered the base 'strip' and roof 'strip' for extra detail/depth - again using 3d glue.
As you build up you layers you can add more bling (like the green pom-pom layer on the base of the above/below piccy - simply sandwiched between the base layers)
 |
| I chose a fairly muted patterned paper cos I wanted to dust over them with the Pan Pastels and achieve a real feel of a battered, worn out, faded, weather worn look. |
 |
| Each home is decorated individually as we do in our own homes.... ...the lived in cluttered look for some , a blingy show look, a minimalistic feel and the shabby chic! All look cosy 'n' loVed |
 |
| How sweet does the door opening looksey - a little heart x |
 |
| I scrunched the top layers of my birdhouses before and after dusting with the Pan Pastels - this helps create the weathered worn out look x |
 |
| I colour coordinated my birdhouses with lush lace from Crafty Ribbons but then I would go and throw in a curve ball with some zingy neons!!! |
Below is another card created last year using the birdhouses - you may well have seen it before but I've popped in extra large piccys for you to peep at this time round cos I know we all loVe to see the details in full x
 |
| This is a tunnel card with a large aperture opening - so there is room for a little scene like this above woodland 'Home Tweet Home' scene if you wish. |
 |
| The natural hues in these yummy Authentique papers inspired this little nature number. |
 |
| A different camera angle allows a peep into the tunnel card to see all the depth and different layers x |
 |
| This birdyhouse has only 2 layers a large and a small patterned paper birdhouse were adhered with the 3d glue then titivated to taste! |
 |
| Mr 'n' Mrs Birdy (again layered) are just sat catching the last of the evenings sun rays And I couldn't resist giving Mrs Birdy (with the 60's pointy glasses) an open chirruping beak!!! TEE HEE!!! |
 |
| The glasses and moustache are my own designs that I painstakingly hand cut out - but they are sooooo worth it x And I'm soooo lucky to have pheasants roaming around cos their fallen feathers look a real treat on this card x |
SO

Quite a few of you have asked about these beautiful wings - invaluable to me I use them quite often as they are sooooo darling perfect!!!
I have found you a link to a site that sells them (PRESS HERE)
Cos where i purchased mine from a couple or 3 years ago no longer stocks them.
It is a UK based site called Bunny Zoe's Crafts
METHOD & INGREDIENTS
I die cut 3 sets of wings, one in plain card stock, one in vellum and the last in glittered card, all were inked with various pretty coloured distress inks on the edges. Once I had adhered them between the hearts I pop a blob or 2 of 3d glue between the layered wings (near to the heart) to create a look of fluttering X
OFFSKI - TTFN
Well I'm offski again - tidy-up time again (spring cleaning on a mega scale at ours - skip coming Wednesday!!! - all my unwanted craft goodies have been given away where ever possible though - not skipped if I can help it!!! but some things are destined for the skip big time!!!)
So when i do sit down to craft it will be for a glorious little hour and like last night my little fingers will be moving like the clappers cos I'm loVing wot I'm up to at the moment!!!
Piccy's for those of you who have not seen them on Facebook.
These fabulous stamps are by Sarah Hurley Designs
Go take a peek at her shop HERE - I just LoVe it x
So I will show 'n' tell when I've finished the 2nd of Sarah's trio of girl stamps
I've nearly finished Dream a Little Dream Girl Stamp
she's cute too!!!
Just sorting the hair - hopefully paper hair this time - we'll see - tee hee!!!
AND
I have another wreath to share with you all - again one from last year
Cath Kidston inspired!!!
Thanks for all your lovely comments
Any questions??? - I will get back to you x
huggles as always
Kassa
XoXo
OFFSKI - TTFN
Well I'm offski again - tidy-up time again (spring cleaning on a mega scale at ours - skip coming Wednesday!!! - all my unwanted craft goodies have been given away where ever possible though - not skipped if I can help it!!! but some things are destined for the skip big time!!!)
So when i do sit down to craft it will be for a glorious little hour and like last night my little fingers will be moving like the clappers cos I'm loVing wot I'm up to at the moment!!!
Piccy's for those of you who have not seen them on Facebook.
These fabulous stamps are by Sarah Hurley Designs
Go take a peek at her shop HERE - I just LoVe it x
 |
| I stamped the 'Be Amazing Girl Stamp' onto Tim Holtz's yummy 'Vintage Shabby' papers. |
 |
| I've decided to calll her Mollie!!! |
 |
| Mollie cos the big pinky updo hairdo was inspired by the late Mollie Sugden aka Mrs Slowcombe from the fabulous... ...'Are You Being Served' BBc show from way back when I was a child . I remember her outrageous ever changing fabulous bouffant hair like it was yesterday x |
I've nearly finished Dream a Little Dream Girl Stamp
she's cute too!!!
Just sorting the hair - hopefully paper hair this time - we'll see - tee hee!!!
AND
I have another wreath to share with you all - again one from last year
Cath Kidston inspired!!!
Thanks for all your lovely comments
Any questions??? - I will get back to you x
huggles as always
Kassa
XoXo


WOW!!! Love the birdhouses - so cute!!! A labour of love I feel! I have pinned it for later! And i've pinned Home Tweet Home! Another work of art! Thank you for sharing! Loving miss 'mollie' slowcombe!! love love love!
ReplyDeleteMo xxx
oh and thanks for the wings! x
Kassa, what fab creations! I love the bird house wreath!!! So much going on, something to keep going back and having a look at. FAB!! As you know I am a tunnel card lover, what a creation you have made, so much to looksey at!! And I just love Mollie, look forward to seeing her "sisters" Axxx
ReplyDeleteOh Kassa your birdhouse wreath is cutes ville central!!! Adore it, want to make one! Love the owl charm, soo cute!! Loved Mollie and can't wait to see what else you do with Sarah Hurley's other stamps. Fab as always flower!! Big hugs, Ali xxxx
ReplyDeleteOh my goodness me!! You are spoiling us! Did you cut the bird houses from your own template they are fab.....cannot think of enough words to use but wow wow wow!!! Hugs and kisses Jules xxx
ReplyDeleteOOOOooooooo the birdy houses look even better close up!!!!
ReplyDeleteThe bird house card is fabby too, who knew I loved birdy stuff so much... hehe
And Mollie is just like Totes Amazeballs!!!! I lurveeeee her and her hair! ;o)
Keep up the good work :oD xx
You are so AMAZING Karen. The birdhouse wreath is sooooooooooooooooooo super cute and I love the soft colours GORGEOUS, Your tunnel card is FABULOUS, loving all the brilliant details and the colour combo, Love it, I love the stamp image doll she is brilliant and I love her hair, Made me smile Love hugs and kisses xxxxxxxxxxxxxxxx
ReplyDelete