


Hi there....
...what fabulous weather we are still getting - I'm loving it and long may it last!
Well I've had a little well a lot of internet trouble again - or should I say a total lack of internet! BUT hey presto with a few trips here and there to purchase the appropriate wangle fandangle gear (I am so techno illiterate and after this last few weeks it looks like ignorance truly is bliss - tee hee) we have V fast internet connection - it's ace and I'm back in touch with Blogland - deep sigh of joy x
So......
....my 1st Christmas offering - I hope you like x
'9 Ladies Dancing'

The AMAZING Girlies are stamps from Sarah Hurley Shop - I am addicted to them, Sarah's stamps are so easy to stamp with and layer up - stamping could not be more fun! And they are a fab price too!
The paper stash I dressed the girlies in is the new Tim Holtz merriment pad - I adore this pad and couldn't wait to get my hands on it - there will be none of this stash left soon cos it is such a user friendly pad, as it alters and distresses real a treat.
The little Santa hats are created using a cute Memory Box die - layered up and covered in DecoArt Snow Writer, sprinkled with Glamour dust for an extra Christmassy sparkle, all from my local craft shop the Craft Box (the little bells, natural and winter white twine are also from the Craft Box)
And the gorgeous snowflake charms are from the Hobby House - unbelievable prices that's why I use so many.
TIPS
I created my wreath ring in minutes - here's how if you don't have a circle cutting gadget.
TECHNIQUES - Mini Tutorial
The little Santa hats are created using a cute Memory Box die - layered up and covered in DecoArt Snow Writer, sprinkled with Glamour dust for an extra Christmassy sparkle, all from my local craft shop the Craft Box (the little bells, natural and winter white twine are also from the Craft Box)
And the gorgeous snowflake charms are from the Hobby House - unbelievable prices that's why I use so many.
TIPS
I created my wreath ring in minutes - here's how if you don't have a circle cutting gadget.
- Draw around a large dinner plate onto chipboard/craft card - cut out.
- Place a side/sandwich plate in the centre of this large circle you have just cut out and draw around that too. Now cut out the small centre circle and you will be left with a wreath ring ready to cover.
- For extra strength (if you so desire) use the wreath ring you have just created as a template and re-draw/cut out another wreath - marry up before adhering to each other. Also you can use the wreath as a template to draw around your choice of covering. Using this technique you can create all different sizes of wreaths, all you need to do is find different sized circular objects to draw around.
Here are some close up step by step piccys for of how I created the girlie with the bubbly hairdo - a sort of mini tutorial x

I used white bling Bazzill Basics card stock - punched out various tiny circles - I used my Crop-A-Dile and my tiny circle punches.

I carefully cut - from the outside inwards - a spiral on a few of the larger circles. I used my much loved and used Pergamano scissors for this as they have excellent fine sharp tips for precise cutting capability.

Now for the remaining circular shapes - the ones you punch from the Crop-A-Dile need to be slightly trimmed - they are left with 2 tiny tiny tags. Then with an embossing tool and an embossing matt shape all the circles gently into a Jelly Tot shape - I like to use larger embossing tool heads for a smoother finish.
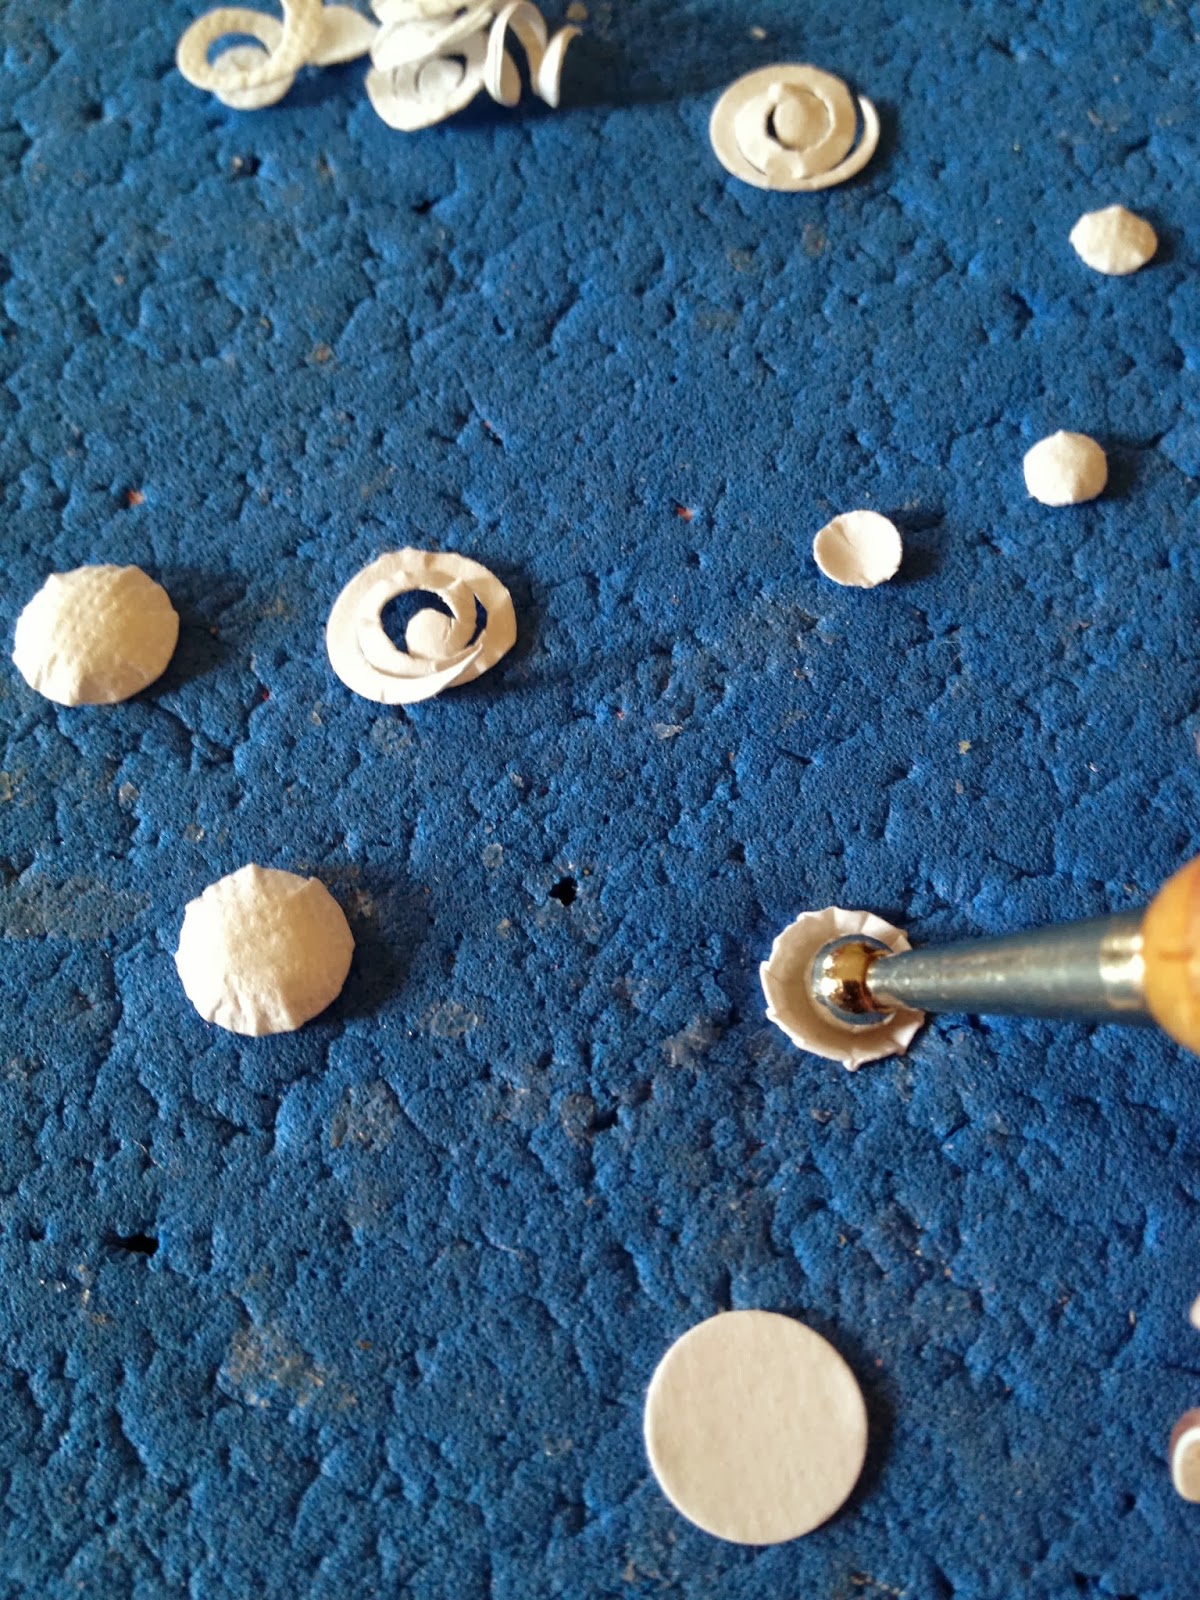
You can get the feel for how deep I eventually push down on the embossing tool.
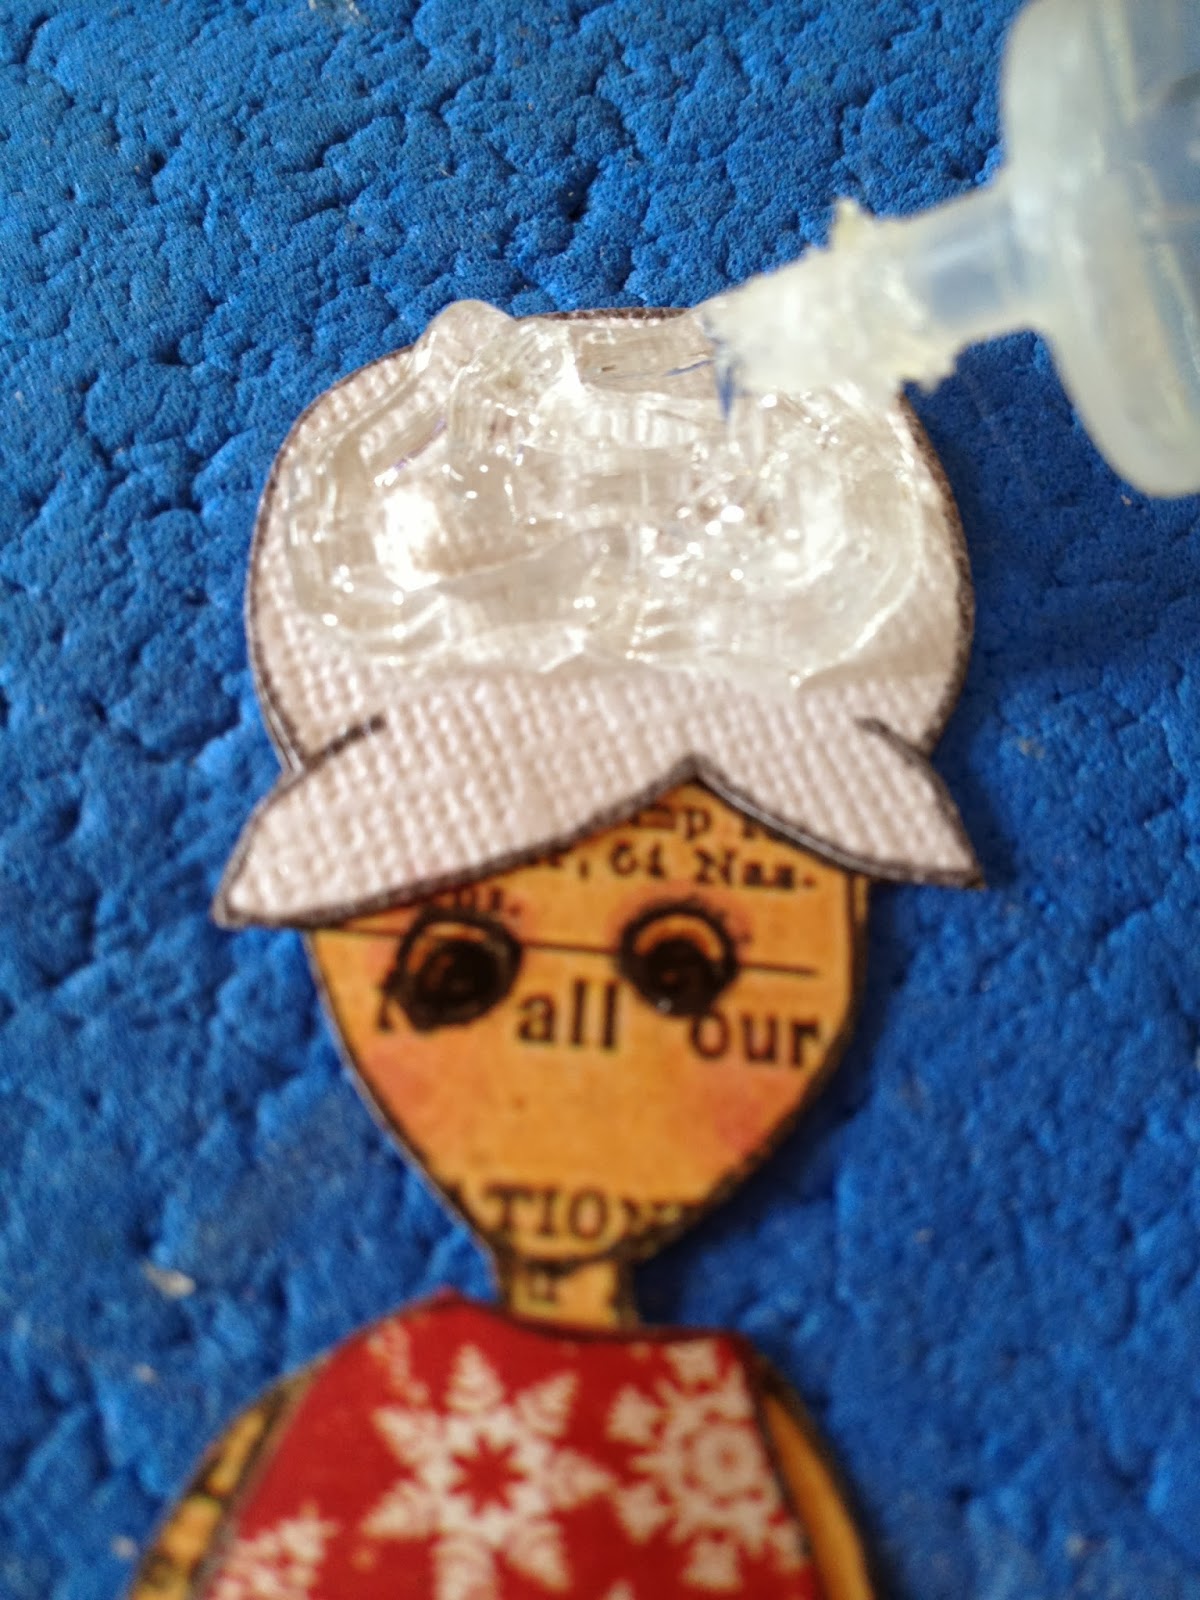
Pinflair glue will give the hair depth and is great for adhering different shaped embellishments to surfaces, really strong too and allows you time to move/style the hair - tee hee.

I start with the largest Jelly Tot shapes first.

Then I slot the spirals gently into place - I use my tweezers to coax the spirals into the Pinflair.

Just add more Pinflair as you need it either onto the head or as shown here onto the individual shapes - or as in my case both!

The Tiny Crop-A-Dile Jelly Tots shapes are used to fill in any small gaps - I also use them to frame the face like wispy kiss curls x And I loved the stray curl so much I left her with it - a sort of dishevelled windswept look x

The fringe is easy peasy - fiddly yes.
Cut tiny slightly curved strips of your card stock and while your Pinflair is still wet push the strips up and under the Jelly Tot Shapes - if they are to long don't worry cos you can give your girlie a haircut!

Apply more Pinflair either under the hairline or on the individual fringe strips if needed - wipe off any excess glue that shows or cover with another fringe strip.

Voilà

Ta Dah!!!
It's a good job the hair isn't created with real Jelly Tots cos it would never get finished cos I'd be constantly be eating it- hee hee hee x
We ll I'm off for now - got to go catchup with my lovely friends over on FB, all I've been doing is ticking 'like' a lately - I need to drop a few lines too - not for the want of trying - but hey I need a few more hours in the day, don't think that's going to happen somehow , do you?
I will be back in with close up shots of all the individual '9 Ladies Dancing' Christmassy girlies so you can get a closer peep at all the details/bling on their frocks and hairdo's x
It's great to be back in, thank you all so much for your lovely kind words on the blog and on FB welcoming me back - you are all so very kind and lovely friends x
Huggles
Kassa
xoxo


Wow love it Hun!! Xxx
ReplyDeleteFab, so much detail, and so well described. Fab!! Axxx
ReplyDeleteThey are all awesome you are so clever. X
ReplyDeleteGorgeous gorgeous girlies loving her hair thanks for the tutorial julie xxx
ReplyDeleteabsolutely gorgeous! and I love the hair tutorial. Thank you for sharing your beautiful work with my stamps, it's always nice to see what my lovelies create :o)
ReplyDeleteSarah x
Thank you Ladies for taking the time to peep at my post.
ReplyDeleteI love all your lovely kind words.
Huggles to you all x
Kassa
xoxo